Saturday, July 16, 2011

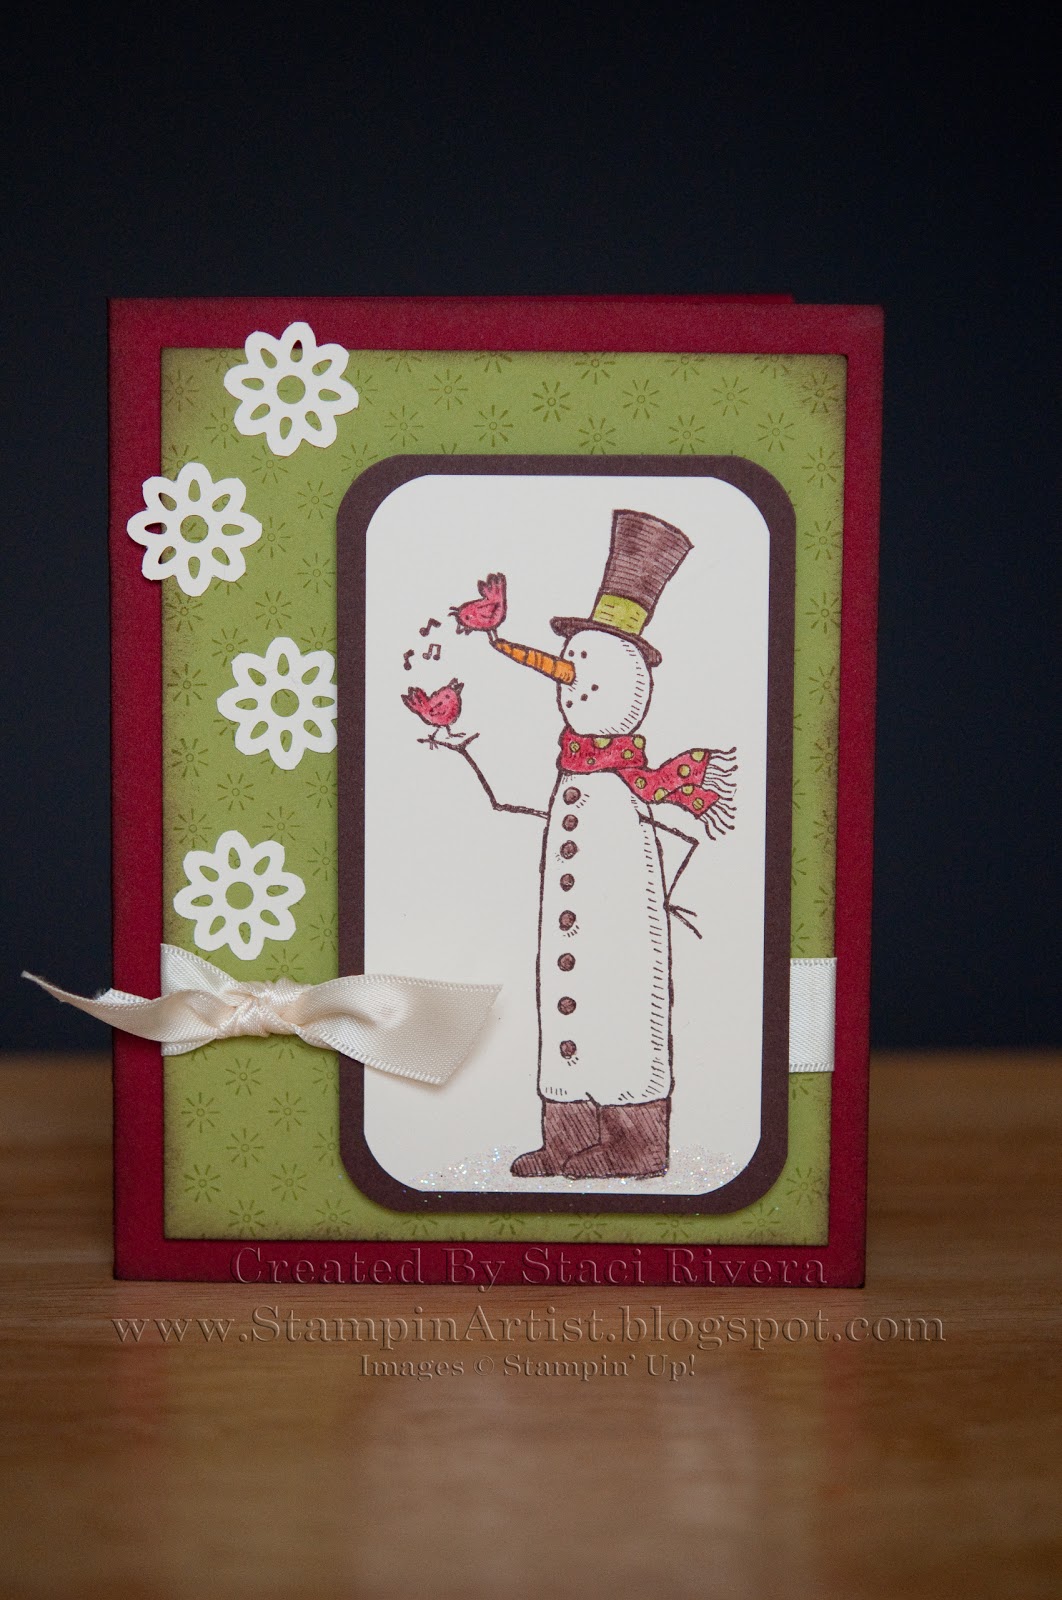
Snow Much Fun from the New catalog

Here is a card that I designed for my recent workshop.  The ladies just loved this one!

I used blender pens and the ink pads to color the snow man.  I used the centers of the Lace Ribbon Border Punch to create the snowflakes.  Just punch a strip of the lace ribbon punch and then clip out the center pieces.  In this close-up you can see that I used the starburst wheel on the Lucky Limeade layer.


I applied dazzling diamonds using my 2 way glue pen to create snow under the snow man and a tiny snow bank next to him.


Here are all of the tools that I used-
Stamps: Snow Much Fun, Starburst Wheel

Ink: Chocolate Chip, Cherry Cobbler, Luck Limeade
Paper: Very Vanilla, Chocolate Chip, Lucky Limeade, Cherry Cobbler, Naturals Ivory
Accessories: Dazzling Diamonds, Very Vanilla Satin Ribbon
Tools: Lace Ribbon Border Punch, Corner Rounder, Blender Pens
Other: Orange Water Color Pencil

Have a creative day!
-Staci

Friday, July 8, 2011

Another Penant Parade

Here is another cute card using that Pennat Parade set and the Petite Pennants Builder punch.  Isn't this cute.  I saw another demonstrator make the ice cream cone and said, "Oh my goodness!  I have to try that," and "wasn't that clever!"  Then when I went to page 69.  I see a card made with the ice cream cone.  yep, right there on page 69, staring me right in the face!  I know, right?  Did I get that inflection right?  I know! right?  I know.  Right!  well anyway, moving on to the making of this card......
Start with your basic easel card.  Just google it for the instructions or follow this link to SplitCoast, http://www.splitcoaststampers.com/resources/tutorials/easelcard/.  Mine is a 4 1/4 x 4 1/4 card so that it fits into an envelope when folded down.  Ha!  As if any of my cards actually fit into an envelope.  Just like my scrapbook pages never fit into the page protectors.  Call me the layer queen! 
Start with the cone in the middle.  Stamp the swirly stamp in Chocolate chip on whisper white and punch out using the penant punch.  (Because if I have to write out petite pennants builder punch one more time! Aaaarghh! (yes, I did just say aaaargh!  see previous pirate posts...))  Then switch to the Cupcake punch and punch the cupcake top in pink pirouette.  And punch the cherry out from Red Glimmer Paper.  Yes, we sell that too.  Page 181.  The other parts are just layering it up, distressing, and tearing.
I used a sentiment from Crazy for Cupcakes.  The little star or snowflake shape is from the Pennant Parade set.  Punch out in 1/2 inch circles and stagger step using multiple pop-up dots.

Stamps: Penant Parade, Crazy for Cupcakes
Paper: Pink Pirouette, Wisteria Wonder, Whisper White
Ink: Wisteria Wonder, Chocolate Chip
Tools:  Big Shot, Perfect Polka Dots Embossing Folder, 1/2" circle punch, Large oval punch, Petite Pennants Punch, Cupcake Punch 

I hope you enjoyed this one!  Happy Stamping!
-Staci

Thursday, July 7, 2011

Happy Happy Birthday with Island Indigo

How can you NOT have a happy birthday with a color named Island Indigo? 
I created this fun Birthday card with the new Penant Parade set and the new hostess set, Happiest Birthday Wishes.

This was not the easiest card to make.  The idea was the easy part.  Executing it took several days because I didn't have the patience to do this all in one shot.  So thank goodness for husbands who sometimes like boring movies.  Well, not boring for him, but not something that captured my attention.  So while listening to him chuckle at this lame movie I busied my hands with threading the linen thread through the itty bitty holes. 

I stamped the pennants in Melon Mambo on Melon Mambo paper using the penant parade stamp set and then punched them out using the new Petite Penants Builder punch.  How cool is that?  6 perfect penants that I didn't have to cut or measure.  Just stamp amd punch.  LOVE IT!!
The top of the pennant is created by using the Dotted Scallop Ribbon Border punch to create a longer stretch of faux ribbon and then cut it in half lengthwise.  They are the perfect little toppers for these pennants.
 You can see the Candle Crazy wheel that I used in the close-up.  I used just one wheel and two spacers on a builder wheel.  That was a fun and new one for me to try.  I used Melon Mambo ink but it looks reddish because it is stamped on top of the Daffodil Delight cardstock.
Stamp the Happy Birthday randomly on the Island Indigo cardstock BEFORE embossing.  Just thought I would mention it.  Te-He-He

So here is the complete ingredient list----
Stamps: Pennant Parade, Happiest Birthday Wishes, and Candle Crazy builder wheel
Paper:  Island Indigo, Melon Mambo, Daffodil Delight, Regal Rose
Ink: Island Indigo, Melon Mambo
Accessories: Neutrals Brads (Basic Gray,) Linen Thread
Tools:  Big Shot, Perfect Polka Dots Embossing Folder, Dotted Scallop Ribbon Border punch, Petite Pennants Builder Punch

Happy Stamping!
-Staci
Saturday, July 2, 2011

New Catalog

Yeah!!!! Yipee!!!  The new catalog is here!  I am so stinking excited!  There are so many great products in this catalog.  Just the ribbon page alone makes me want to jump for joy!
So here is one of the two projects that we created at my workshop last night.  We had 8 ladies and 7 of them signed up for my club.  Whoo-hoo!

This is a cute little 3x3 notecard.  Also called a love note.  I used pop up dots under the frame.  And I created the blossom using the boho blossom punch and a So Saffron Brad.  The leaves of this brad were created by sponging the medium sized blossom and then cutting away two leaves.  Cut it into a sort of heart shape.  Choose 2 petals that are side by side and cut towards the center.  The bottom portion of the heart is glued behind the other blossom.  Finish by setting a brad in the center and curling the edges of the blossom up towards the brad.

Items Used

Stamps: Four Frames p.141, Three Little Words p.166
Ink: Wisteria Wonder, Lucky Limeade, Concord Crush p.176
Paper: Wisteria Wonder, Lucky Limeade, Concord Crush, Whisper White p.176
Accessories: So Saffron Brads (subtles brads) p.199
Tools: Scallop Trim Border Punch & Decorative Label Punch p.209

I hope you are enjoying the new catalog as much as I am!  Until next time, Happy Scrapping!
-Staci

Sunday, June 26, 2011

Beware Pirates

Beware Pirates is one of my favorite stamp sets.  I am so sad to see it retire.  I made this scrapbook layout for my son, Logan, who loves to dress up like a pirate.  He calls the Renaissance festival "the pirate place."
I loved the opportunity to use the Designer Series Paper Pack.  I just love that print!
I made the colored background behind the boat by combining the brayering technique with spongeing.  I first brayered More Mustard and then Cajun Craze over the top of the More Mustard layer.  I then sponged Night of Navy on the bottom portion.  I then stamped over it in Staz On Black ink to really help the silhouette to stand out. 

I also used the Beware Pirates sentiment to create a small title for the page.  I love it when I can use so many of the stamps from one stamp set on the same project!
Here is the materials list:
Stamp sets:  Beware Pirates
Inks: Basic Black, Night of Navy, More Mustard, Cajun Craze, Chocolate Chip, Staz On Black
Paper: Night of Navy Designer Series Paper, Basic Black, Very Vanilla, Night of Navy, Chocolate Chip
Accessories:  Chocolate Chip Marker, Neutrals Brads
Tools:  Brayer

Happy Scrapping!
-Staci

Wednesday, June 22, 2011

Goodbye Cogs Punch

Here is a Scrapbook Page that I created for my son's second birthday.  I used one of my favorite stamp sets:  Extreme Elements.  This is somewhat an unusual layout for me because I chose to use ONLY one photograph.  It is also a typical layout in that I created a piece of background paper and created an embellishment.

I used a lot of different Stampin' Up! products in this layout.  Everything except the spray pen that I used is Stampin' Up!  I know, I know, [insert shameless self advertising here] right? I started with a 12x12 of Whisper White paper.  I laid it down on that brown packaging paper that comes in the Stampin' Up! boxes.  Double kudos to me for helping the environment!  Then I took a spray mister- this is a small spray bottle created for crafters- that  I bought at the stamp expo but I am sure you can find them at your local craft store or you can buy them from my favorite Close to My Heart consultant, Wendy Taylor.  Fill the spray mister part way with water and add a few drops of Cajun Craze Classic Ink Refill.  The spray comes out heavy so stand back.  I stand over mine- the page is on the floor and I am standing over it.  Set that aside and let it dry.
I then cut the Designer series paper in Cajun Craze and Not Quite Navy- these are both found in the Regals paper stack.  I am very happy that the paper stacks will be exactly the same in the new upcoming catalog.
 
The small piece of paper at the top left is a little tricky.  I started by brayering a whisper white piece of paper with Not Quite Navy ink.  I didn't cover the entire thing with ink.  Then sponge around it and then stamp a few of the Extreme Elements onto it.
For the cork piece, I stamped the fleur onto the cork with NQN and then punched it out with a 1 3/4" circle punch.  I then used the Cogs Punch to punch out a large cog in Cajun Craze and Basic Black.  Don't forget that the Cogs Punch is retiring at the end of this month.

I chose to cut out the individual letters instead of using a Stamp-a-ma-jig to line them up perfectly.  The little cogs are also from the cogs punch.
That was a lot to type!!!!  I hope you enjoyed this page layout.  I better go make dinner for my little indians! 
Happy Stamping,
Staci


Stamps:  Extreme Elements, Jayne's Type Alphabet
Paper:  Cajun Craze and Not Quite Navy Designer Series Paper; Whisper White, Basic Black, Cajun Craze, and Not Quite Navy Cardstock
Ink:  Not Quite Navy
Accessories: Cork Sheets
Tools:  Cogs Punch, 1 3/4" Circle Punch, Brayer
Other:  Cajun Craze Ink Refill, Spray Mister

Sunday, June 19, 2011

Goodbye Hello Again

Strange title isn't it?  I am sad to say goodbye to the set called Hello Again.  Yep, it's on the retiring list.  So is the retro remix wheel that matches the set. 
I just love making three by three cards.  I made several variations of this card with this wheel and set.  It was such a great pair for whipping up a simple card.  I liked that I could make the look of patterned paper quickly with the stamp set or with the wheel.  On this card I used the wheel in Cajun Craze on So Safron cardstock to create the feel of patterned paper.  The base of the card is Elegant Eggplant.


Stamps:  Hello Again, Retro Remix wheel
Paper:  Elegant Eggplant, Cajun Craze, So Saffron
Ink:  Cajun Craze
Accessories:  Hemp Twine
Tools:  Piercing Tool, Mat Pack, Crop-a-dile, Small and Large Tag Punches

I will be back soon with more retiring cards and layouts.  Until then, Happy Stamping!
-Staci